Download the pre-built disk image, adjust the size of the virtual machine to fit your host then execute the script to create the VirtualBox machine.
The steps are:
-
Download the Pre-Built Image.
-
Configure the Create_VM script if required.
-
Execute the Create_VM script to create the virtual machine.
Download the Pre-Built Image
WindowsMacLinux
-
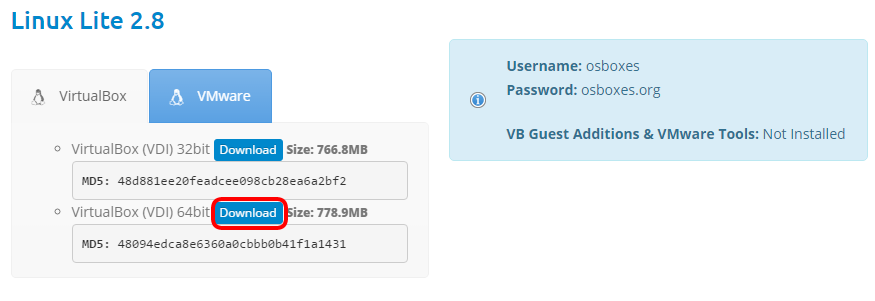
From the Linux Lite page on osboxes.org http://www.osboxes.org/linux-lite/ select the 64 (or 32) bit VirtualBox image of the latest Linux Lite build.
-
Save the downloaded file into the cockroach-vb-single directory. Its file name will be something like
LinuxLite_<version>-64bit.7z.
Note:
Even if you are using a 32 bit host operating system, you can still download and install a 64 bit VirtualBox guest. The download is about 750Mb so it may take a few minutes depending on your internet connection.
Uncompress the Pre-Built Image
Use the uncompress utility installed previously to extract the VirtualBox disk image file.
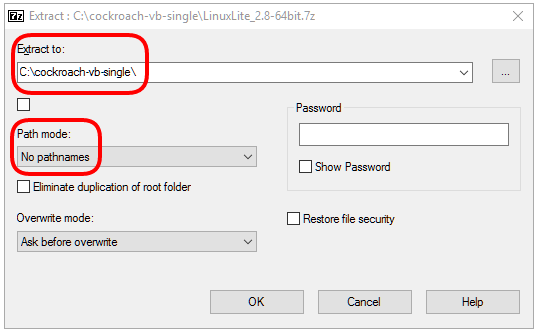
On Windows
Windows
- Use the 7-Zip utility to uncompress the disk image. By default the utility will create a
64bit directory that contains the extracted disk image.
On Mac
Mac
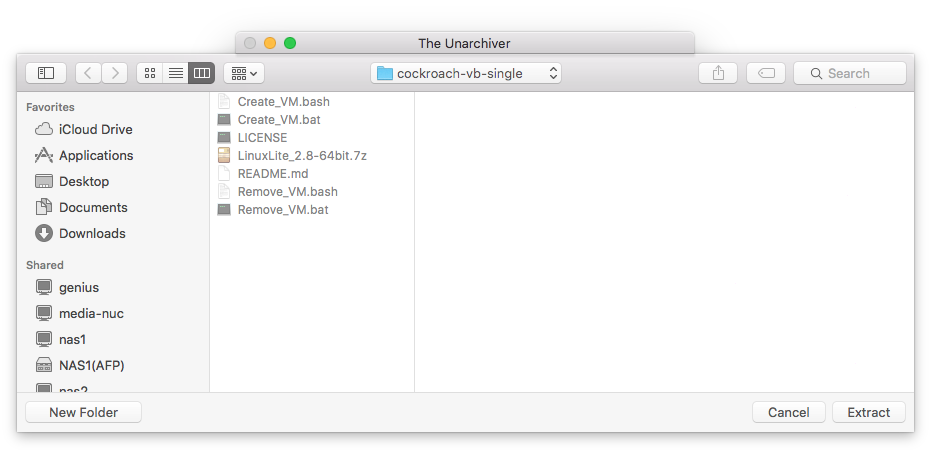
- The downloaded .7z file should already be associated with The Unarchiver utility. Double-click on the file to extract the disk image. Uncompress the disk image into the
cockroach-vb-single directory. By default the utility will create a 64bit directory that contains the extracted disk image.

On Linux
Linux
- Use strong coffee to uncompress the disk image into the
$HOME/cockroach-vb-single directory.
The Create_VM script that was download as part of the host machine setup contains all the instructions to create your virtual machine. There are a couple of things you may need to edit within the script before it’s executed.
If you didn’t change the location of the default machine folder when you installed VirtualBox and you are happy with the default memory and CPU configuration of the virtual machine, you can skip straight to the Execute the Create_VM Script section.
Important:
The "Create_VM" script you will need is either the "Create_VM.bat" script if you have a Windows host, or "Create_VM.bash" if you have a Mac or Linux host.
Machine Folder Location
The location of the default VirtualBox Machine Folder is %HOMEDRIVE%%HOMEPATH%\VirtualBox VMs on Windows which is usually something like C:\Users\<username>\VirtualBox VMs. This is where the virtual machine will get created.
If you changed this location during the installation of VirtualBox, change the value of the MACHINE_FOLDER variable in the Create_VM script to match.
Windows
On Windows:
set MACHINE_FOLDER=%HOMEDRIVE%%HOMEPATH%\VirtualBox VMs
MacLinux
On Mac/Linux:
MACHINE_FOLDER="${HOME}/VirtualBox VMs
Memory
WindowsMacLinux
The default virtual memory is 2Gb. This should be enough to start 3 CockroachDB nodes but more is preferable. If your host has greater than 6Gb, it’s suggested that you set the memory to the smaller of 4Gb or half your physical memory.
-
Change the 2048 on the line below in the Create_VM script to the desired amount of memory (in Kb).
On Windows/Mac/Linux:
VboxManage modifyvm "CockroachDB" --memory 2048 --vram 128
CPUs
WindowsMacLinux
The default number of virtual CPUs in the create script is 2. This should be enough to run 3 CockroachDB nodes but more is preferable. The recommended number is up to half of the number of physical CPUs, including hyper-threading.
-
Change the 2 on the line below in the Create_VM script to the desired number of CPUs.
On Windows/Mac/Linux:
VboxManage modifyvm "CockroachDB" --cpus 2
Execute the Create_VM Script
The Create_VM script will:
-
Create a VirtualBox machine called “CockroachDB”
-
Configure the virtual machine as per the create script.
-
Start the virtual machine.
On Windows
Windows
-
On the host machine, using the Windows File Manager, in the cockroach-vb-single directory, double-click on the Create_VM.bat script file to execute it.
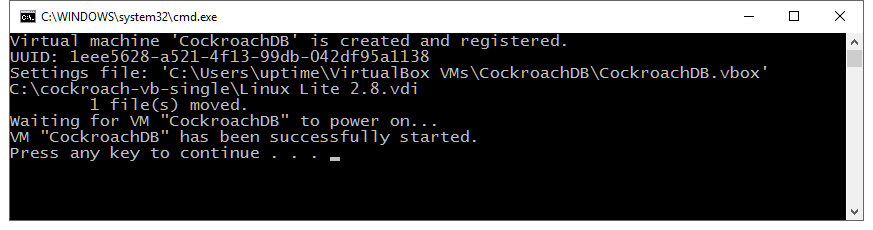
The script will pause at the end so you can review its output before hitting return to close the window.
On Mac
Mac
- On the host machine, using the Terminal application, change directory into
cockroach-vb-single and execute the Create_VM.bash script using . ./Create_VM.bash.
iMac:cockroach-vb-single uptimeDBA$ . ./Create_VM.bash
Virtual machine 'CockroachDB' is created and registered.
UUID: df120c2a-bac3-4dc8-b7e1-dd77087e86ba
Settings file: '/Users/uptimeDBA/VirtualBox VMs/CockroachDB/CockroachDB.vbox'
Waiting for VM "CockroachDB" to power on...
VM "CockroachDB" has been successfully started.
iMac:cockroach-vb-single uptimeDBA$
On Linux
Linux
- Coming soon.
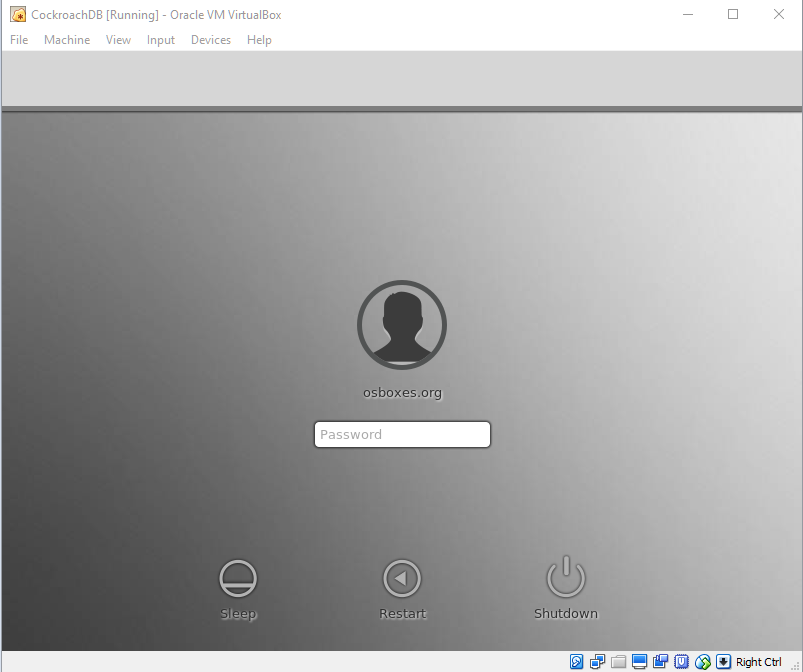
Log On to the Machine
The virtual machine will start in full GUI mode using the Xfce window manager. Login using the pre-installed user osboxes whose password is osboxes.org. It has sudo configured to enable it to execute any super-user (root) commands as required. This is the account we will install CockroachDB into.
-
Login using the default user osboxes with password osboxes.org
The first time you log on you will be presented with a “Welcome to Linux Lite” window which lets you do things like install updates etc. Just de-select the “Show this dialog on startup.” checkbox and click Close. You should be able to maximize the window the virtual machine is running in so it will be full screen.
Tip:
Now that you have a working virtual machine you may want to re-open this guide in the machine's browser (FireFox comes pre-installed). It will make copying and pasting commands much easier.
What’s Next
Download and install the CockroachDB software and start the Database Cluster.